本文重点介绍如何使用由 Azure OpenAI 服务提供支持的 Semantic Kernel 创建自己的 Copilot。我们将尝试利用大型语言模型(LLM)的优势与外部服务的集成。这将使您了解如何真正实现您的 Copilot 目标,不仅与零售业,而且与任何行业,无论是电力和公用事业,政府和公共部门等。它的整体功能和潜在的应用场景都远超于聊天机器人。
让我们从使用 Semantic Kernel 构建一个基本的聊天客户端开始。这很简单,因为您所要做的就是使用 AddAzureOpenAIChatCompletion 类创建内核,并提供包含一些样板代码的系统提示。提供终结点和 API 密钥(我将其存储在环境变量中)后,生成 kernel,提供系统提示,其中包含一个循环,该循环通过流式处理调用 Azure OpenAI 服务。这个循环不会中断,因为它只是一个永无止境的聊天机器人。但是,您可能希望围绕它构建自己的逻辑。
 1
 2
 3
 4
 5
 6
 7
 8
 9
10
11
12
13
14
15
16
17
18
19
20
21
22
23
24
25
26
27
28
29
30
31
32
33
34
35
36
37
38
39
40
41
42
43
44
45
46
47
48
49
50
51
52
53
54
55
56
57
58
59
60
61
62
63
64
65
66
67
68
69
70
71
72
|
using Microsoft.SemanticKernel;
using Microsoft.SemanticKernel.ChatCompletion;
using Microsoft.SemanticKernel.Connectors.OpenAI;
using static System.Environment;

namespace CustomCopilot
{
    internal class Program
    {

        static async Task Main(string[] args)

        {
            // Create a kernel with the Azure OpenAI chat completion service
            var builder = Kernel.CreateBuilder();
            builder.AddAzureOpenAIChatCompletion("gpt-35-turbo-16k",
                GetEnvironmentVariable("AOI_ENDPOINT_SWDN")!,
                GetEnvironmentVariable("AOI_KEY_SWDN")!);

            // Build the kernel
            var kernel = builder.Build();

            // Create chat history
            ChatHistory history = [];
            history.AddSystemMessage(
              @"You're a virtual assistant that helps people find information.");

            // Get chat completion service
            var chatCompletionService =
            kernel.GetRequiredService<IChatCompletionService>();

            // Start the conversation
            while (true)
            {
                // Get user input
                Console.ForegroundColor = ConsoleColor.White;
                Console.Write("User > ");
                history.AddUserMessage(Console.ReadLine()!);

                // Enable auto function calling
                OpenAIPromptExecutionSettings openAIPromptExecutionSettings = new()
                {
                    MaxTokens = 200
                };

                // Get the response from the AI
                var response =
                chatCompletionService.GetStreamingChatMessageContentsAsync(
                               history,
                               executionSettings: openAIPromptExecutionSettings,
                               kernel: kernel);


                Console.ForegroundColor = ConsoleColor.Green;
                Console.Write("\nAssistant > ");

                string combinedResponse = string.Empty;
                await foreach (var message in response)
                {
                    //Write the response to the console
                    Console.Write(message);
                    combinedResponse += message;
                }

                Console.WriteLine();

                // Add the message from the agent to the chat history
                history.AddAssistantMessage(combinedResponse);
            }
        }
    }
}
|
现在如果你只是在控制台应用程序中用 Program.cs 运行代码并提供必要的配置,它应该像 ChatGPT 一样工作。到目前为止,你可能看到在互联网上相同的演示,向你展示如何使用 Azure OpenAI API 并增强业务能力。让我们为它添加一些变化,继续问它现在几点了。
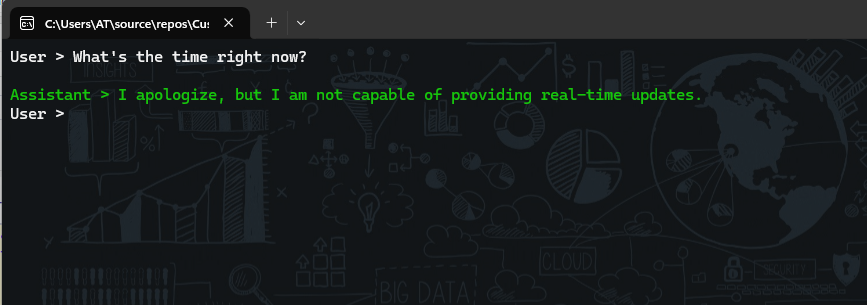
这就是事情开始变得有趣的地方。当前的 LLMs 不善于告诉你时间,解决复杂的数学问题,让你了解事实(仅仅是因为它们没有连接到互联网,默认情况下)。
Semantic Kernel 包含一些必要概念和功能,例如 AI 插件、原生函数、提示等,这里不再详细介绍了,可以去官网查阅文档。只是简要解释一下,插件是一种为 AI Copilot(或代理)添加功能和能力的方法。它们现在基于 OpenAI 插件规范,这意味着它们可以与其他 AI 平台(如 ChatGPT、Microsoft 365 等)互操作。插件可以包含本机代码(例如 C# 或 Python)和提示(例如对 AI 服务的请求)。您可以使用插件来访问数据、执行操作或使用其他 AI 模型增强您的代理。例如可以创建一个插件搜索网络,发送电子邮件,生成图像甚至使用Microsoft Word,插件就像 AI 应用程序的手,允许它与现实世界进行交互。Semantic Kernel 插件的另一个优点是,其中一些插件已由团队作为单独的软件包发布。这意味着您不必自己编写所有内容,而是也可以使用一些内置的。例如在我们的例子中,我们将使用 TimePlugin 来解决这个问题。
你所要做的就是添加下面这些代码。
 1
 2
 3
 4
 5
 6
 7
 8
 9
10
11
12
13
|
// Create a kernel with the Azure OpenAI chat completion service
 var builder = Kernel.CreateBuilder();
 builder.AddAzureOpenAIChatCompletion("gpt-35-turbo-16k",
     GetEnvironmentVariable("AOI_ENDPOINT_SWDN")!,
     GetEnvironmentVariable("AOI_KEY_SWDN")!);

 // Load the plugins
 // add this namespace Microsoft.SemanticKernel.Plugins.Core;
 #pragma warning disable SKEXP0050
 builder.Plugins.AddFromType<TimePlugin>();

 // Build the kernel
 var kernel = builder.Build();
|
添加完上面的代码后,kernel 需要解决当用户询问时间与通常的 ChatGPT 响应时,它如何知道我需要运行 TimePlugin?从广义上讲,有两种方法可以应对这一问题。
- 获取您自己在插件中注册的所有函数(在我们的例子中是 TimePlugin)并手动调用函数。
- 使用内核的自动函数调用功能(超级酷,你会知道为什么!)
因此,我们将使用自动函数调用,要启用它,您只需要一行代码。在 while 循环中,只需设置一个 ToolCallBehavior 属性。
 1
 2
 3
 4
 5
 6
 7
 8
 9
10
11
|
// Get user input
Console.ForegroundColor = ConsoleColor.White;
Console.Write("User > ");
history.AddUserMessage(Console.ReadLine()!);

// Enable auto function calling
OpenAIPromptExecutionSettings openAIPromptExecutionSettings = new()
{
    MaxTokens = 200,
    ToolCallBehavior = ToolCallBehavior.AutoInvokeKernelFunctions
};
|
添加 ToolCallBehavior 并添加 TimePlugin 后,可以运行应用,并应看到如下所示的输出。
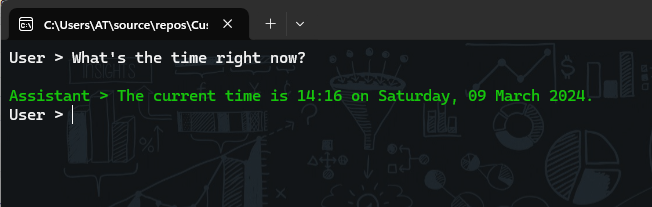
我们看到控制台按预期输出时间了。但是,我们的目标是创建一个 Copilot,并添加3个不同的功能(或者您也可以说 Plugins)。每个插件都有自己的意义,并且是独立的。这意味着可以根据我们的需要添加或删除它,而无需修改大量代码。Copilot 的这种可插拔特性使我们的解决方案保持干净且易于管理。以下是功能详细信息:
- 航班跟踪
- 气象雷达
- 零售搜索
我们现在将为每个功能创建一个插件。要创建插件,您需要定义一组可以向 AI 应用和服务公开的函数(或单个函数)。每个函数都应该有一个语义描述,解释它的作用、输入和输出以及它可能产生的副作用,即函数内部发生了什么及其返回值。这有助于 AI 了解如何使用您的插件并计划实现用户目标的最佳方式。您还可以为插件指定角色,该角色定义了插件的行为方式以及与用户的通信方式。例如,你可以让你的插件变得严苛或友好。
航班跟踪
该插件将使用 Aviation Stack API (免费计划)来获取航班的详细信息。对于免费版本,您需要提供 IATA 航班代码(例如 EK 414)或提供 IATA 源名称(例如 DXB/LHE)和 IATA 目的地名称。最初,我认为我们必须编写2个函数,一个是获取 IATA 名称 ,例如 API 所期望的悉尼的 SYD。否则,您将无法获得正确的响应。只需查看下面的屏幕截图,您可以看到我提供的 dep_iata 为迪拜, arr_iata 为悉尼。它没有返回任何东西。但是,当我将其更改为实际代码时,它返回了正确的响应。
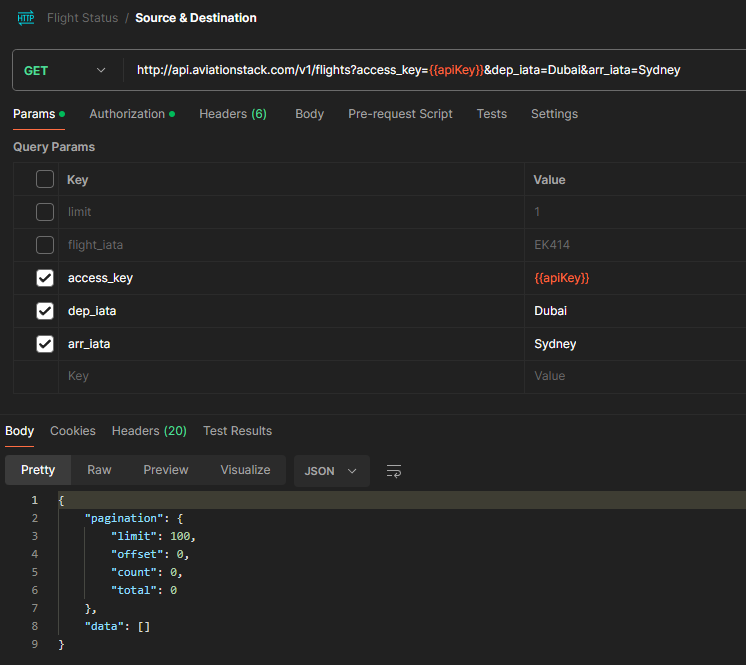

很明显,除非您提供正确的 IATA 代码名称,否则您无法真正从 API 获得任何响应,但有趣的是,事实并非如此。借助函数语义描述的强大功能,它需要 LLM 和我们编写的代码的强大功能才能为您带来最佳结果。以下是我为航班跟踪写的代码:
 1
 2
 3
 4
 5
 6
 7
 8
 9
10
11
12
13
14
15
16
17
18
19
20
21
22
23
24
25
26
27
28
29
30
31
32
33
34
35
|
using Microsoft.SemanticKernel;
using System;
using System.Collections.Generic;
using System.ComponentModel;
using System.Linq;
using System.Text;
using System.Threading.Tasks;

namespace CustomCopilot.Plugins.FlightTrackerPlugin
{
    public class FlightTrackerPlugin(string apiKey)
    {
        readonly HttpClient client = new HttpClient();

        [KernelFunction, Description("Tracks the flight status of a provided source and destination")]
        [return: Description("Flight details and status")]
        public async Task<string> TrackFlightAsync(
        [Description("IATA code for the source location")] string source,
        [Description("IATA code for the designation location")] string destination,
        [Description("IATA code for the flight")] string flightNumber,
        [Description("Count of flights")] int limit)
        {
            string url = $"""http://api.aviationstack.com/v1/flights
            ?access_key={apiKey}&dep_iata={source}&arr_iata={destination}
            &limit={limit}&flight_iata={flightNumber}""";

            HttpResponseMessage response = await client.GetAsync(url);
            response.EnsureSuccessStatusCode();
            string responseBody = await response.Content.ReadAsStringAsync();

            return responseBody;
        }

    }
}
|
这只是一个类的一个函数。这意味着,一个插件只有一个本机功能。如果你注意到,从定义到它的参数再到它的返回值,我已经为这个函数中的几乎所有内容提供了描述 。这些语义描述的原因是 Semantic Kernel 将有效地使用 AI 来处理请求。这就是为什么,如果您注意到源和目的地,我会分别为源/目的地位置编写 IATA 代码。通过提供此描述,无需调用单独的服务来解析城市名称,在我们的示例悉尼中,它可以自动将其转换为 SYD。
一旦你完成了你的插件类,你所要做的就是回到你的 Program.cs 文件,并在 TimePlugin 之后 添加这个插件。下面是代码片段:
1
2
3
|
builder.Plugins.AddFromObject(new FlightTrackerPlugin(
  GetEnvironmentVariable("AVIATIONSTACK_KEY")!),
  nameof(FlightTrackerPlugin));
|
添加此行代码后。我的建议是将系统提示更改为 “You’re a virtual assistant that helps people track flight and find information. ”。 执行并查看是否得到类似的响应:


现在您可以轻松地看到,我们的 Copilot 已经开始通过与正确的插件交互并给我们预期的响应。
气象雷达
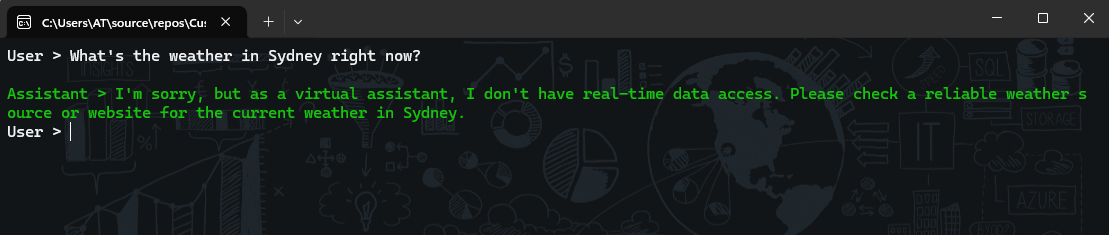
就像航班跟踪插件一样 ,您将编写气象雷达插件。这个插件将使用天气 API,它也是免费的,非常易于使用。我创建了一个单独的类文件,在其中创建了一个函数来获取天气。
 1
 2
 3
 4
 5
 6
 7
 8
 9
10
11
12
13
14
15
16
17
18
19
20
21
22
23
24
25
26
27
28
29
30
|
using Microsoft.SemanticKernel;
using System;
using System.Collections.Generic;
using System.ComponentModel;
using System.Linq;
using System.Text;
using System.Threading.Tasks;

namespace CustomCopilot.Plugins.WeatherPlugin
{
    public class WeatherPlugin(string apiKey)
    {
        HttpClient client = new HttpClient();

        [KernelFunction, Description("Gets the weather details of a given location")]
        [return: Description("Weather details")]
        public async Task<string> GetWeatherAsync(
        [Description("name of the location")] string locationName)
        {
            string url = $"""http://api.weatherapi.com/v1/current.json
            ?key={apiKey}&q={locationName}&aqi=no""";

            HttpResponseMessage response = await client.GetAsync(url);
            response.EnsureSuccessStatusCode();
            string responseBody = await response.Content.ReadAsStringAsync();

            return responseBody;
        }
    }
}
|
按照前面的示例,您只需编写以下代码行即可注入它:
1
2
3
|
builder.Plugins.AddFromObject(new WeatherPlugin(
  GetEnvironmentVariable("WEATHERAPI_KEY")!),
  nameof(WeatherPlugin));
|
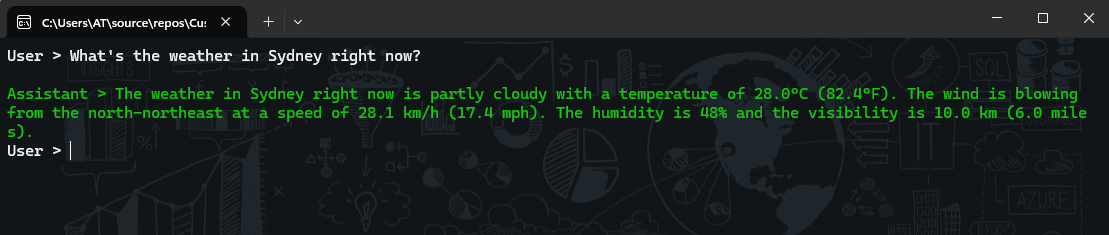
现在如果您再次运行它,您将能够看到即将到来的天气。这是因为您的 Copilot 现在正在与外部服务交互。
零售搜索
最后来编写一个零售搜索插件。此插件将使用 Azure Maps (或必应地图 API)来定位我们想要的位置。同时调整一下系统消息为:
1
2
3
4
5
6
|
You're a virtual assistant responsible for only flight tracking,
weather updates and finding out the right places within Australia
after inquiring about the proximity or city. You should not talk
anything outside of your scope. Your response should be very concise
and to the point. For each correct answer, you will get some $10
from me as a reward. Be nice with people.
|
这就是零售搜索插件代码的样子。
 1
 2
 3
 4
 5
 6
 7
 8
 9
10
11
12
13
14
15
16
17
18
19
20
21
22
23
24
25
26
27
28
29
30
31
32
33
34
35
36
37
38
39
40
41
42
43
44
45
46
47
48
49
50
51
52
53
54
|
using Azure.Maps.Search.Models;
using Azure.Maps.Search;
using Azure;
using Microsoft.SemanticKernel;
using System;
using System.Collections.Generic;
using System.Linq;
using System.Text;
using System.Threading.Tasks;
using System.ComponentModel;

namespace CustomCopilot.Plugins.PlaceSuggestionsPlugin
{
    public class PlaceSuggestionsPlugin
    {
        MapsSearchClient client;
        HttpClient httpClient = new HttpClient();
        string APIKey;

        public PlaceSuggestionsPlugin(string apiKey)
        {
            APIKey = apiKey;
            AzureKeyCredential credential = new(apiKey);
            client = new MapsSearchClient(credential);
        }

        [KernelFunction, Description("Gets the place suggestions for a given location")]
        [return: Description("Place suggestions")]
        public async Task<string> GetPlaceSuggestionsAsync(
        [Description("type of the place")] string placeType,
        [Description("name of the location")] string locationName)
        {
            var searchResult = await client.SearchAddressAsync(locationName);

            if (searchResult?.Value?.Results.Count() == 0) { return null; }

            SearchAddressResultItem locationDetails = searchResult!.Value.Results[0];

            string url = @$"https://atlas.microsoft.com/search/fuzzy/json
            ?api-version=1.0&query={placeType}
                    &subscription-key={APIKey}
                    &lat={locationDetails.Position.Latitude}
                    &lon={locationDetails.Position.Longitude}
                    &countrySet=AU
                    &language=en-AU";

            HttpResponseMessage response = await httpClient.GetAsync(url);
            response.EnsureSuccessStatusCode();
            string responseBody = await response.Content.ReadAsStringAsync();

            return responseBody;
        }
    }
}
|
现在,您只需将这行代码添加到现有的 Copilot 代码中,它应该就可以正常工作了。
1
2
3
|
builder.Plugins.AddFromObject(new PlaceSuggestionsPlugin(
  GetEnvironmentVariable("AZUREMAPS_SUBSCRIPTION_KEY")!),
  nameof(PlaceSuggestionsPlugin));
|
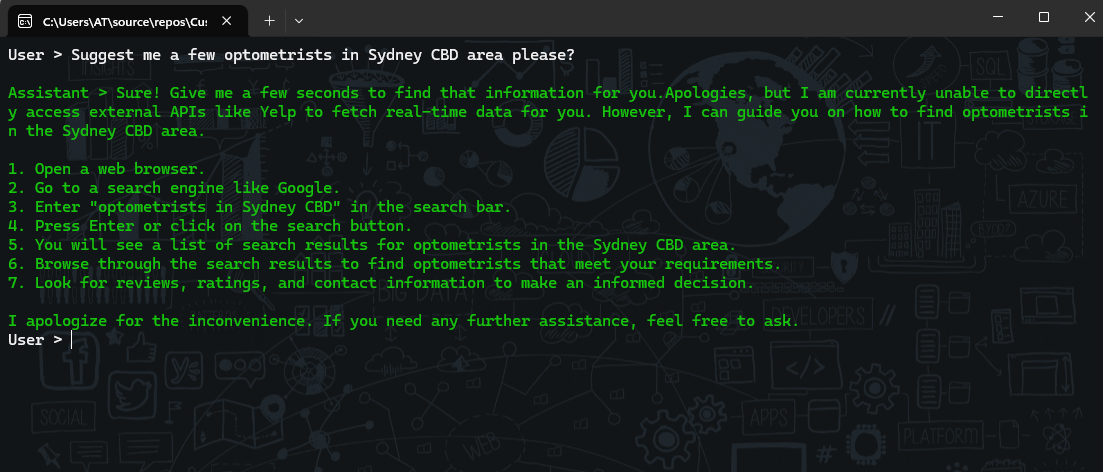
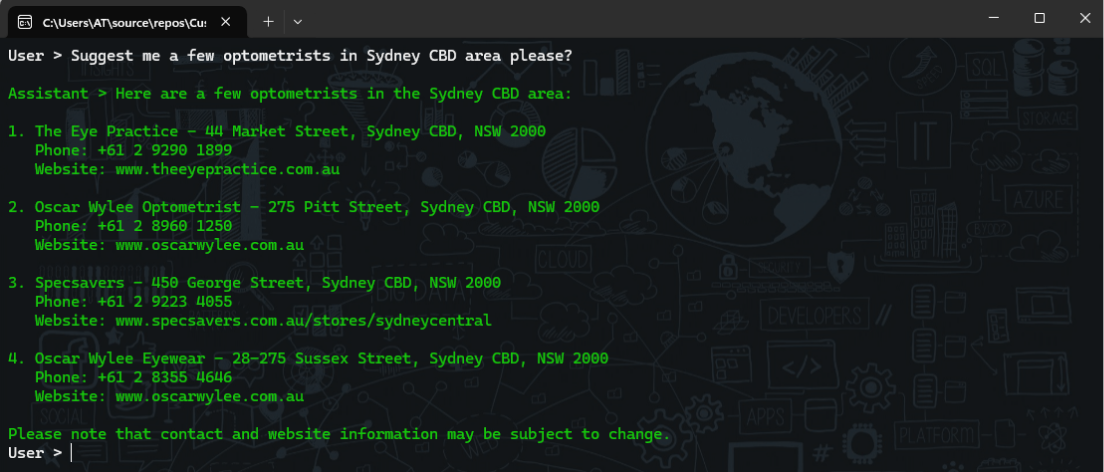
再次启动控制台应用,现在应看到类似于以下内容的内容:
整合所有插件
到现在为止,您一定已经看过 Copilot 的个别案例,它们可以很好地与外部资源配合使用。现在让我们将它们组合在一起,并尝试提出一些可以调用所有自定义插件并使用 LLM 功能的东西。
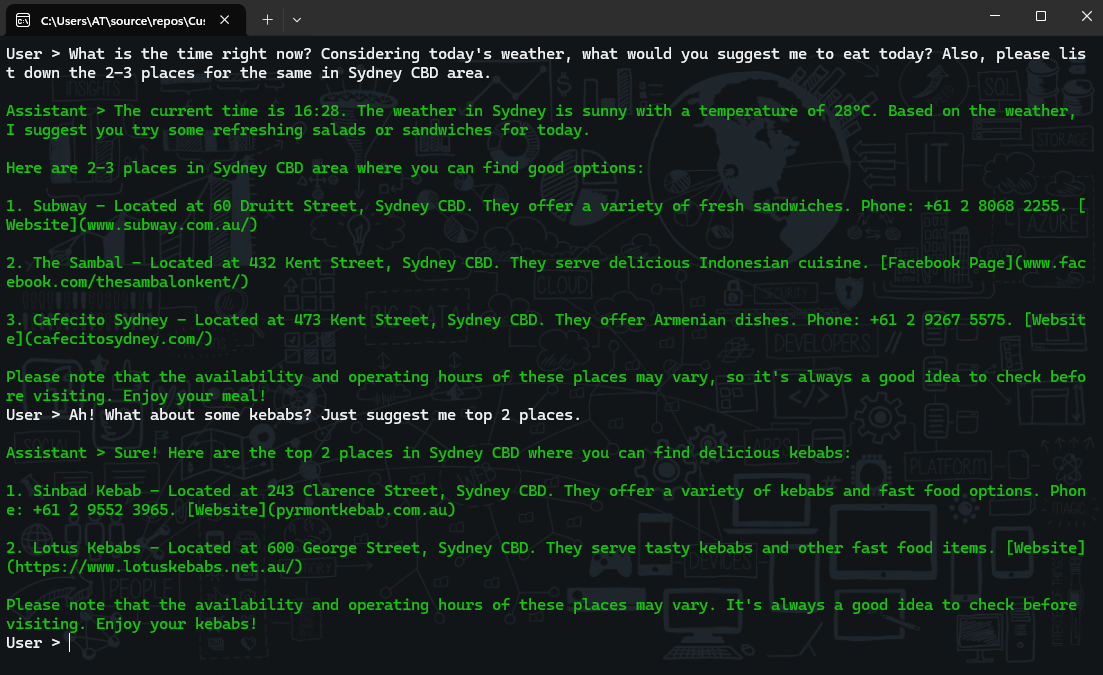
祝贺!你已经构建了自己的 Copilot,它是轻量级的,独立于各种插件,也可以使用不同的框架在任何频道上显示。到此为止很高兴你了解了用例以及学会如何使用 Semantic Kernel 和 Azure OpenAI 服务。
总而言之,使用 Semantic Kernel 和 Azure OpenAI 服务创建自定义 Copilot 意味着利用人工智能的力量来增强人类能力并丰富我们的体验。它意味着弥合自然语言和机器语言之间、人类和机器智能之间、本地知识和全球知识之间的鸿沟。这意味着探索可以与各种服务和领域交互的 AI-First 应用程序的可能性。Semantic Kernel 作为灵活、轻量级和富有表现力的框架以及 Azure OpenAI 服务作为可缩放且强大的平台构建 Copilot 将越来越轻松。